今までHeroku環境で開発したことしかありませんでしたが、Shopifyのカスタムアプリ開発を機にAWSでのサーバレス環境の構築にチャレンジしてみることになりました。
今回は下記のブログを参考にAWSにSPA + Serverless構成にしてみました。

私自身、AWSはS3くらいしか触ったことがなく、全くの初心者での構築になります。
基本的に、動作確認・検証は行っていますが、解説に間違いがある場合はコメントで指摘いただけると助かります!
開発環境
フロントエンド
React.js
Amplify Hosting
└S3
└Cloudfront
バックエンド
Node.js / aws-serverless-express
Serverless Framework
└API Gateway
└Lambda
└DynamoDB
参考文献
・全体構成
https://www.nri-digital.jp/tech/20200526-2059/
・サンプルコード
https://github.com/t-kurasawa/shopify_dev_template
・Serverless Framework インストール
https://www.serverless.com/framework/docs/getting-started/
・JWTについて
https://docs.aws.amazon.com/ja_jp/cognito/latest/developerguide/amazon-cognito-user-pools-using-tokens-verifying-a-jwt.html
https://github.com/serverless/examples/blob/master/aws-node-auth0-cognito-custom-authorizers-api/auth.js
https://github.com/awslabs/aws-support-tools/blob/master/Cognito/decode-verify-jwt/decode-verify-jwt.ts
・AWS Amplify
https://docs.amplify.aws/start/q/integration/react
・Amazon DynamoDB
https://aws.amazon.com/jp/dynamodb/getting-started/
Git クローン
今回、倉澤さんが公開して下さったサンプルコードを元に環境構築を行っていきます。
このコードは、Shopify管理画面上に登録している商品一覧が表示され、かつ新規商品の登録ができるカスタムアプリになっています。
まずは、アプリをクローンしましょう。
$ git clone git@github.com:t-kurasawa/shopify_dev_template.git
$ cd shopify_dev_template
ディレクトリ構成は次のようになっています。
shopify_dev_template
 └app
  └api-serverless(サーバー側)
  └react-amplified(フロント側)
 └shopify-app-cli
 └themekit
 └README.md
基本的に、appディレクトリのapi-serverlessがサーバ側のコードになっていて、react-amplifiedがフロント側のコードになっています。
まずは、サーバ側のapi-serverlessについて構築します。
Serverless FrameworkでバックエンドAPIを構築
バックエンドは、AWSのServerless Frameworkで構築していきます。
Amplifyのapi/functionは拡張性が弱いため利用しないそうです。
まずは、Serverless Frameworkのインストールを行います。
$ curl -o- -L https://slss.io/install | bash
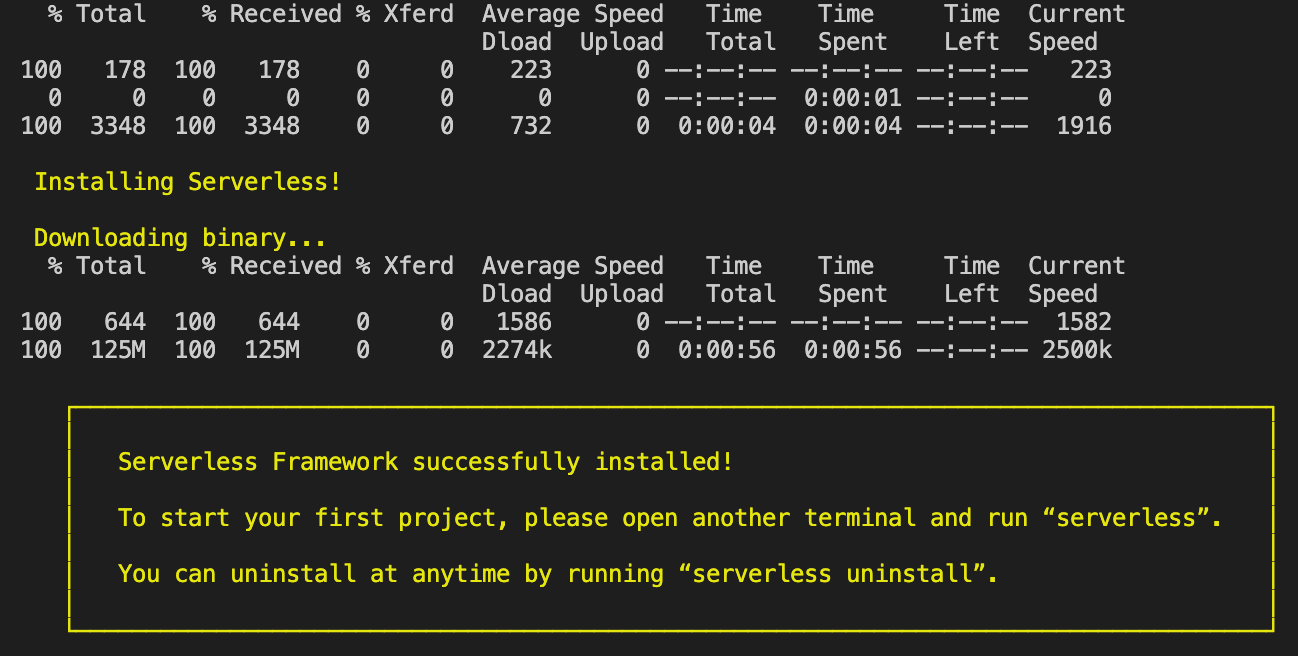
※参考文献:https://www.serverless.com/framework/docs/getting-started/
次に、ビルドを行いましょう。
$ cd app/api-serverless
$ yarn install
ちなみに、yarn installはpackage.jsonの中身をインストールするコマンドですが、何をインストールするのか自分なりに調べてみました。
読み飛ばしても環境構築には影響しないので、必要ない方は次に進んで大丈夫です。
yarn install でインストールしている中身は下記のコードになります。
調べて記載していますが、理解に間違いがあればコメントください!
@babel/core, bable-loader : JavaScriptコンパイラです。色んなバージョンのJSを統一するコンパイラです。
aws-sdk : AWS SDK 本体。
aws-serverless-express : node.jsのwebアプリケーションフレームであるExpressの書き方で、API Gateway + Lambdaで動きます。
axios : ブラウザやnode.js上で動くPromiseベースのHTTPクライアントです。非同期にHTTP通信を行いたいときに容易に実装できます。
cors : 追加のHTTPヘッダーを使用して、あるオリジン(URL)で動作しているwebアプリケーションに、異なるオリジンにある選択されたリソースへのアクセス権を与えるようブラウザーに指示するための仕組みです。
jsonwebtoken : JWT(JSON Web Token)とは、JSONデータ構造で表現したトークンの仕様。
jwk-to-pem : JSON Web Keyを公開鍵に変換するためのライブラリ
{
  "name": "api-serverless",
  "version": "1.0.0",
  "main": "index.js",
  "license": "MIT",
  "dependencies": {
    "@babel/core": "^7.9.6",
    "aws-sdk": "^2.673.0",
    "aws-serverless-express": "^3.3.8",
    "axios": "^0.19.2",
    "babel-loader": "^8.1.0",
    "body-parser": "^1.19.0",
    "cors": "^2.8.5",
    "crypto": "^1.0.1",
    "express": "^4.17.1",
    "jsonwebtoken": "^8.5.1",
    "jwk-to-pem": "^2.0.3",
    "moment": "^2.26.0",
    "request": "^2.88.2",
    "serverless-dotenv-plugin": "^2.4.2",
    "serverless-webpack": "^5.3.1",
    "shopify-api-node": "^3.3.1",
    "webpack": "^4.43.0"
  }
}
Amplifyでフロントエンドの環境構築
次に、Amplifyを使ってフロントエンドの環境構築をしましょう。
このサンプルコードでは、フロント側の言語はReact.jsを採用しています。
まずは、Amplifyのインストールを行います。
$ cd ../react-amplified
$ curl -sL https://aws-amplify.github.io/amplify-cli/install | bash && $SHELL
インストールが完了したら、Amplify の設定を行いましょう。
$ amplify configure
https://console.aws.amazon.com/
Press Enter to continue
=>AWSアカウントにログインを求められるので、ログインしてください。ログイン後、エンターを入力します。
そうすると、色々質問されるので一つ一つ回答して行きます。
Specify the AWS Region
? region:  (Use arrow keys)
  us-east-1
  us-east-2
  us-west-2
  eu-west-1
  eu-west-2
  eu-central-1
❯ ap-northeast-1
(Move up and down to reveal more choices)
東京のap-northeast-1にします。
Specify the username of the new IAM user:
? user name:  (amplify-xxxxx)
ローマ字で本名を登録しました。
そしてら、勝手にブラウザが開くのでIAM を作成しましょう。
設定は、チュートリアルのgifがわかりやすかったので転載します。
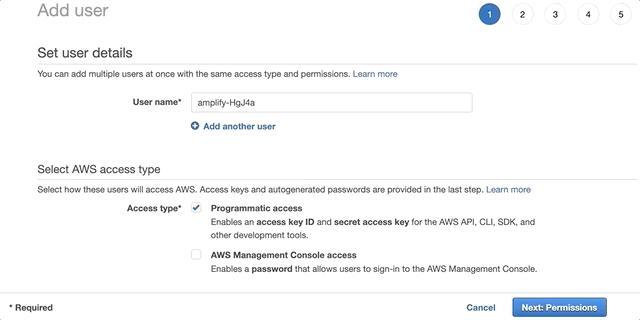
ここで、アクセスキーとシックレットキーを忘れずにコピーしましょう。
できたら、ターミナルでエンターを押して次に進みます。
Enter the access key of the newly created user:
? accessKeyId:  ********************
? secretAccessKey:  ****************************************
アクセスキーとシークレットキーを入力して、AWSのプロフィールネームを設定します。
次に、ローカルでのAWSプロフィールを作成しましょう。
This would update/create the AWS Profile in your local machine
? Profile Name:
以上で、Amplifyのセットアップ終了です!
次にビルドを行いましょう。ディレクトリは、app/react-amplifiedに移動してください。
$ yarn install
(app/react-amplifiedで実行してください)わかる範囲で、package.jsonの中身を解説していきます。
@shopify/app-bridge, @shopify/app-bridge-react : Shopifyが提供しているapp bridgeというツールです。説明はこちら。
@shopify/polaris : Shopifyが提供しているUIキットです。Bootstrapのようなイメージです。
@testing-library/* : reactなどのテスト用ライブラリです。
amazon-cognito-identity-js : Amazon Cognitoというサービスを使うライブラリです。ユーザーのサインアップ、認証、更新、削除を行うことができます。
aws-amplify : AWS Amplifyを使うためのライブラリです。
{
  "name": "react-amplified",
  "version": "0.1.0",
  "private": true,
  "dependencies": {
    "@material-ui/core": "^4.9.13",
    "@shopify/app-bridge": "^1.21.3",
    "@shopify/app-bridge-react": "^1.21.3",
    "@shopify/polaris": "^4.21.0",
    "@testing-library/jest-dom": "^4.2.4",
    "@testing-library/react": "^9.3.2",
    "@testing-library/user-event": "^7.1.2",
    "amazon-cognito-identity-js": "^4.2.3",
    "aws-amplify": "^3.0.10",
    "aws-sdk": "^2.676.0",
    "axios": "^0.19.2",
    "query-string": "^6.12.1",
    "react": "^16.13.1",
    "react-dom": "^16.13.1",
    "react-router-dom": "^5.1.2",
    "react-scripts": "3.4.1",
    "shopify-api-node": "^3.3.1",
    "uuid": "^8.0.0"
  },
  "scripts": {
    "start": "react-scripts start",
    "build": "react-scripts build",
    "test": "react-scripts test",
    "eject": "react-scripts eject"
  },
  "eslintConfig": {
    "extends": "react-app"
  },
  "browserslist": {
    "production": [
      ">0.2%",
      "not dead",
      "not op_mini all"
    ],
    "development": [
      "last 1 chrome version",
      "last 1 firefox version",
      "last 1 safari version"
    ]
  }
}
フロント側のビルドが完了したら、amplifyを使ってユーザー認証していきましょう。
$ amplify init
(基本的に、ひたすらEnterで問題ありません)
Note: It is recommended to run this command from the root of your app directory
? Enter a name for the project (reactamplified)
? Enter a name for the environment (dev)
? Choose your default editor: (Use arrow keys)
❯ Visual Studio Code
  Atom Editor
  Sublime Text
  IntelliJ IDEA
  Vim (via Terminal, Mac OS only)
  Emacs (via Terminal, Mac OS only)
  None
? Choose the type of app that you're building (Use arrow keys)
  android
  flutter
  ios
❯ javascript
? What javascript framework are you using (Use arrow keys)
  angular
  ember
  ionic
❯ react
  react-native
  vue
  none
? Source Directory Path:  (src)
? Distribution Directory Path: (build)
? Build Command:  (npm run-script build)
? Start Command: (npm run-script start)
Using default provider  awscloudformation

For more information on AWS Profiles, see:
https://docs.aws.amazon.com/cli/latest/userguide/cli-configure-profiles.html

? Do you want to use an AWS profile? (Y/n)
=> Y
? Please choose the profile you want to use (Use arrow keys)
❯ default
これで、S3やCloudFormationの設定が完了しました。
次に、ホスティング機能を使い、CloudFront + S3でWebアプリのフロントエンドを公開しましょう。
まず、ホスティングを構築します。
$ amplify add hosting
? Select the plugin module to execute
  Hosting with Amplify Console (Managed hosting with custom domains, Continuous deployment)
❯ Amazon CloudFront and S3
今回は、あくまで勉強のために環境構築をしているので、継続的なデプロイは必要ありません。
そのため、Amazon CloudFront and S3を選択します。
? Select the environment setup: (Use arrow keys)
  DEV (S3 only with HTTP)
❯ PROD (S3 with CloudFront using HTTPS)
Shopifyとの連携にはHTTPSが必要なので、開発環境(DEV)ではなく、本番環境(PROD)を選択してhttpsを使えるようにします。
? hosting bucket name (reactamplified-xxxxxxxxxx-hostingbucket)S3のバケット名は何でも良いのでそのままエンターを押しましょう。
認証機能Cognitoの設定
次に、amplifyを使ってAmazon Cognitoの設定をしましょう。
Cognitoは、ユーザーの登録、認証、更新、削除などができるサービスです。
$ amplify add auth
Using service: Cognito, provided by: awscloudformation

 The current configured provider is Amazon Cognito.

 Do you want to use the default authentication and security configuration? (Use arrow keys)
❯ Default configuration
  Default configuration with Social Provider (Federation)
  Manual configuration
  I want to learn more.
Warning: you will not be able to edit these selections.
How do you want users to be able to sign in?
Username
❯ Email
Phone Number
Email or Phone Number
I want to learn more.Do you want to configure advanced settings? (Use arrow keys)
> No, I am done.
Yes, I want to make some additional changes.Amplifyを使った公開と環境変数の設定
設定が完了したら、ここまでの設定情報を公開しましょう。
$ amplify publish
✔ Successfully pulled backend environment dev from the cloud.
Current Environment: dev
| Category | Resource name | Operation | Provider plugin |
| -------- | --------------- | --------- | ----------------- |
| Hosting | S3AndCloudFront | Create | awscloudformation |
? Are you sure you want to continue? (Y/n)
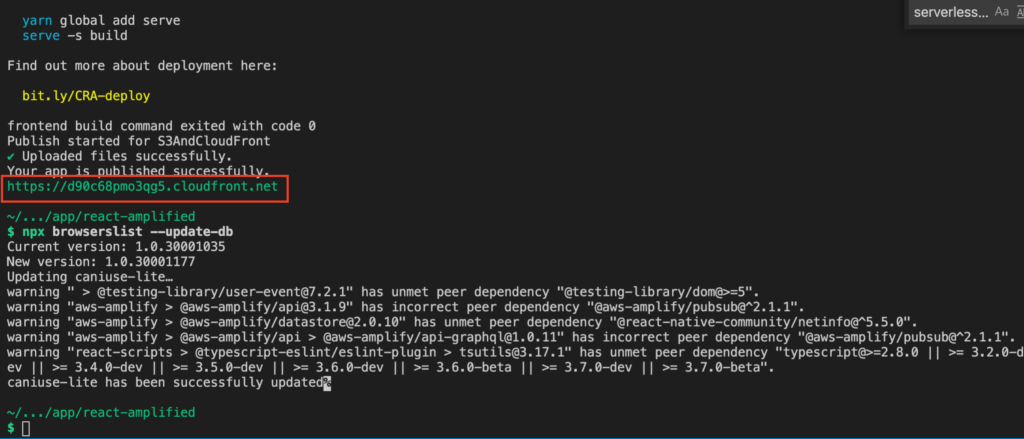
=> Y2020年12月現在、caniuse-liteが古くなっているという警告が表示されてしまっています。
次のコマンドを入力しろということなので、とりあえず指示にしたがって入力しておきます。
$ npx browserslist --update-dbこれで、cloudfrontのURLが発行されました。URLは、下図に表記されています。
CloudFrontのURLが発行されたら、Shopifyのカスタムアプリ側でURLを設定しましょう。
Shopifyカスタムアプリの設定
今度は、Shopifyのパートナーダッシュボードからカスタムアプリを作成します。
アプリURLとリダイレクトURLに先ほど発行されたCloudFrontのURLを使いましょう。
- アプリURL:https://クラウドフロントURL/auth
- リダイレクトURL:https://クラウドフロントURL/callback
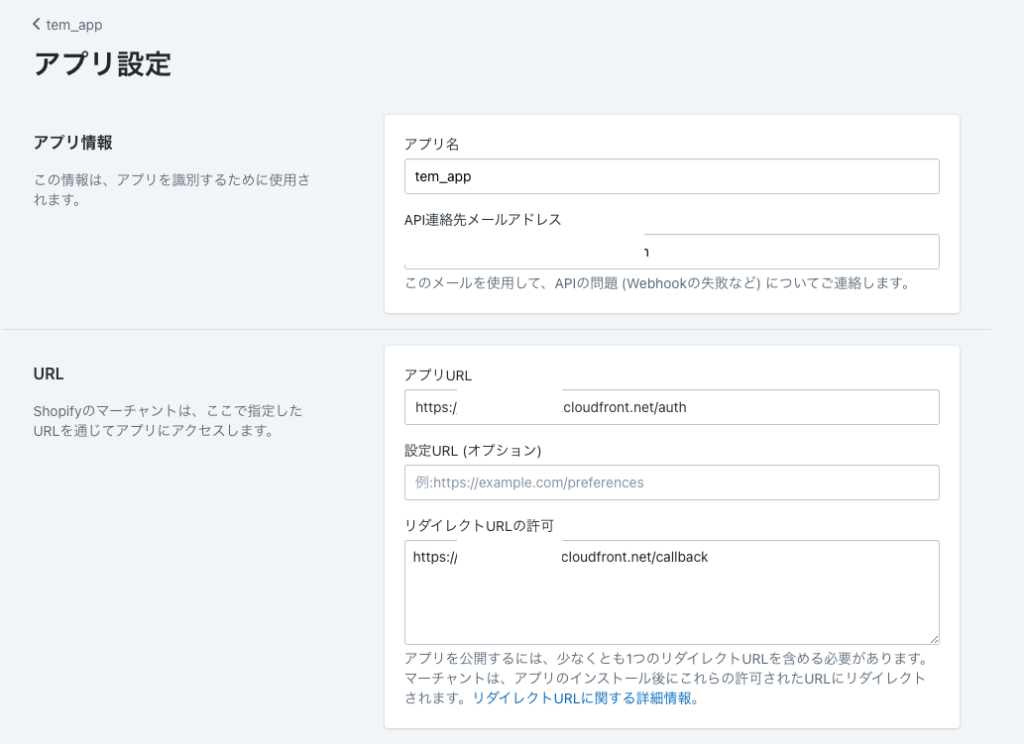
app/react-amplified/.envのREACT_APP_APPLICATION_URLにもURLを設定しましょう。
作成したら、APIキーとAPIシークレットキーをメモしておきます。

app/api-serverless/.env.exampleをコピーして、同じディレクトリに.envファイルを作成しましょう。
先ほどコピーした、APIキーとAPIシークレットキーをSHOPIFY_API_KEYとSHOPIFY_API_SECRETに記入してください。
次に、CloudFrontでCORSエラーが発生するらしいので対策します。
まずは、AWS の CloudFrontのコンソール画面にログインします。

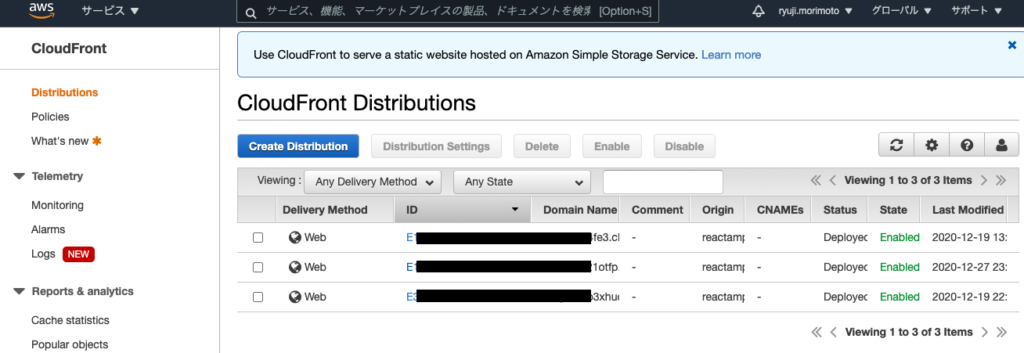
対象のID部分をクリックして編集していきます。
・「Behaviors」タブをクリックし、チェックボックスにチェックを入れて「Edit」をクリック
・「Cache Based on Selected Request Headers」を「White List」に変更
・「Whitelist Headers」で「Origin」をAddで追加
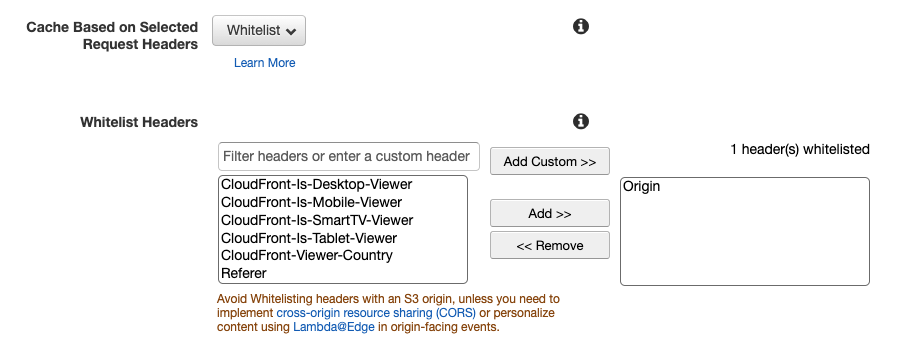
ページ下部の「Yes, Edit」で変更を保存します。
次にユーザプールID、クライアントID、Identity_プールIDを環境変数に設定して行きます。
事前に、app/react-amplified/.env.exampleをコピーして、同じディレクトリに.envファイルを作成しておきましょう。
※ターミナルから確認する方法がわからなかったので、下記のURLから確認しました。
他に確認方法があれば、コメントで教えていただけると嬉しいです。
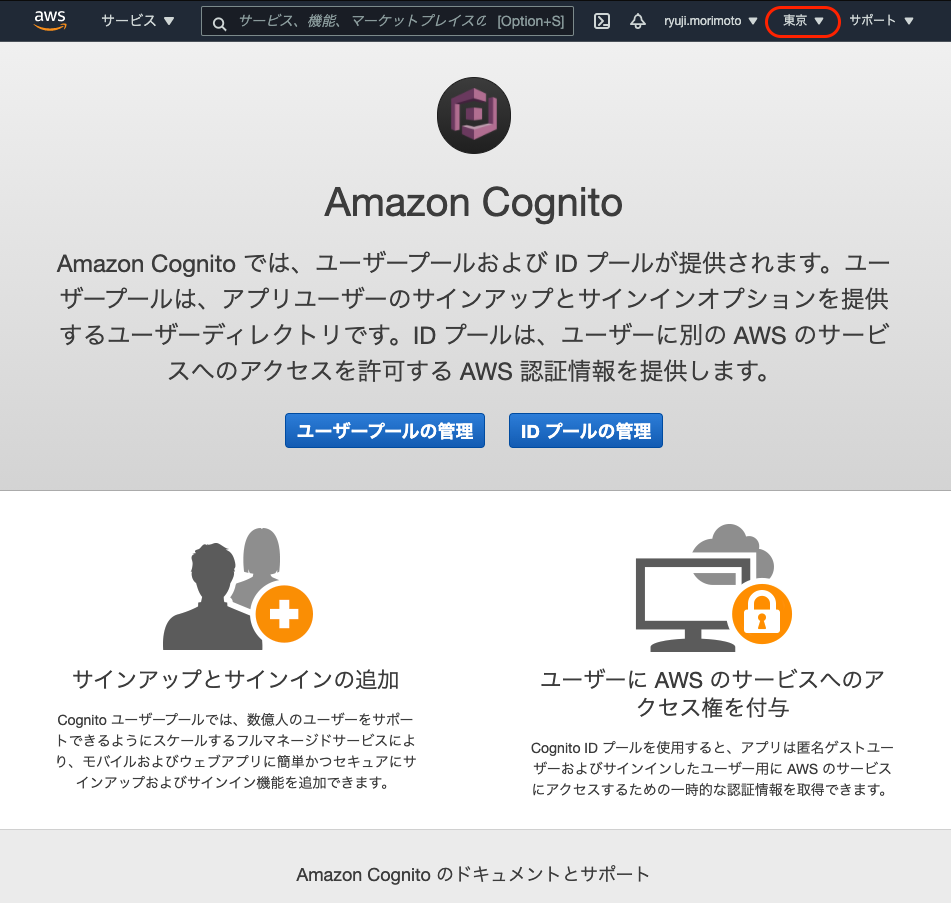
Amazon Cognitoにサインインします。下図のように、リージョンを東京にしましょう。
作成されたアイデンティティを選択し、右上の「IDプールの編集」をクリックしてください。
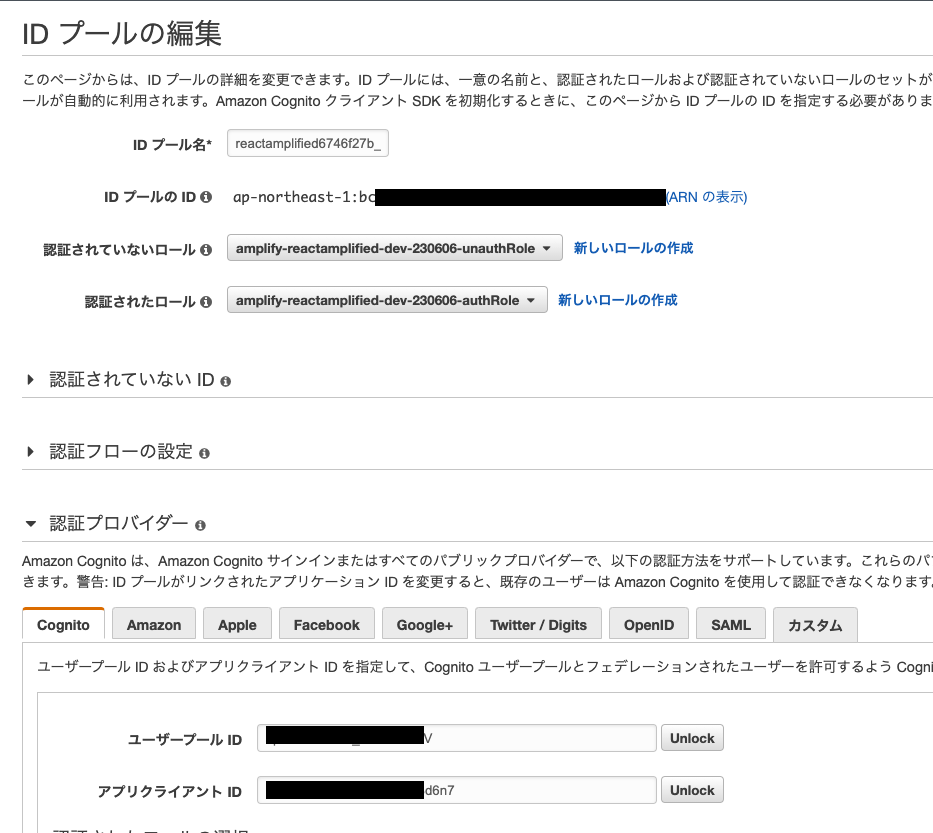
ここで確認できる、
- 「IDプールのID」をapp/react-amplified/.envのREACT_APP_COGNITO_IDENTITYPOOLIDに設定
- 「ユーザープールID」をapp/react-amplified/.envのREACT_APP_COGNITO_USERPOOLIDと、app/api-serverless/.envのCOGNITO_USER_POOL_IDに設定
- 「アプリクライアントID」をapp/react-amplified/.envのREACT_APP_COGNITO_CLIENTIDと、app/api-serverless/.envのCOGNITO_CLIENTIDに設定
- app/react-amplified/.envのREACT_APP_COGNITO_REGIONと、app/api-serverless/.envのREGIONに、「ap-northeast-1」を設定
します。
ついでに、REACT_APP_SHOPIFY_API_KEYにShopifyカスタムアプリのAPIキーを、REACT_APP_SCOPESに read_products,write_products,read_product_listings を入力しましょう。
実際の会員登録は、app/react-amplified/src/Top.jsの88行目あたりで行っています。
ただし、このサンプルコードでは会員登録画面を作成しておらずコードで無理矢理登録している感じです。
会員登録するために、app/react-amplified/src/Top.jsの90行目のコメントアウト外し、”your-email@mail.com” を自分のメールアドレスに変更します。
async componentDidMount() {
    // TODO: ログイン画面の作成(signup -> confirmation -> login を一旦代替)
    const res = await cognito.signUp('xxxxxxxxxx@gmail.com', 'P@ssw0rd1234567890')
    // const res = await cognito.confirmation('xxxxxxxxxx@gmail.com',"123456")
    // const res = await cognito.login('xxxxxxxxxx@gmail.com', 'P@ssw0rd1234567890')
デプロイ
まずは、サーバ側でデプロイしましょう。
事前にServerless Frameworkをインストールしているので、下記のコマンドを入力するだけです。
※.envに環境変数が入力されていることを確認してください。
※ディレクトリは、app/api-serverless で実行してください。
$ cd ../api-serverless
$ serverless deploy
デプロイが完了すると、APIのエンドポイントが発行されるのでコピーしておきます。
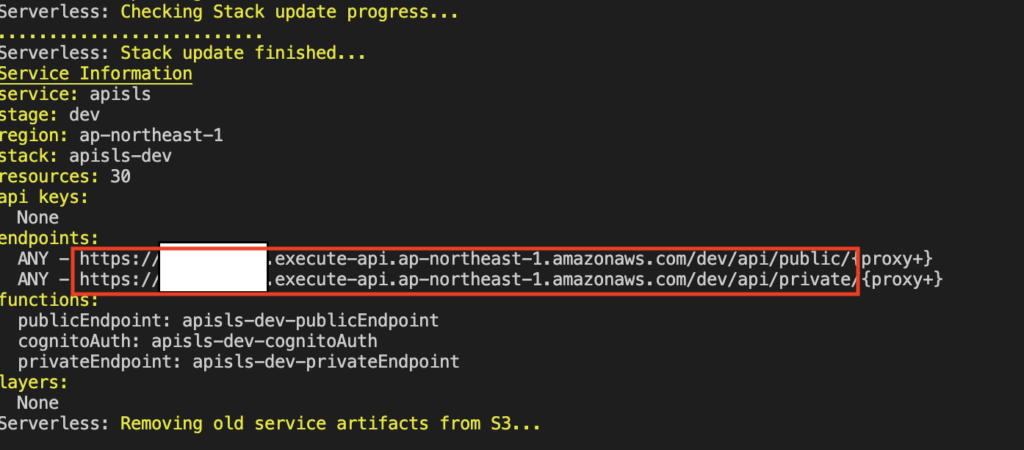
これをそれぞれapp/react-amplified/.envのREACT_APP_PUBLIC_API_URLとREACT_APP_PRIVATE_API_URLに設定します。
環境変数を変更したので、Amplify で公開しましょう。
$ cd ../react-amplified
$ amplify publish
公開した内容が反映されるまで数時間かかるらしいです。
すぐに反映させたい場合は、次の手順を行いキャッシュをクリアします。
・CloudFrontのコンソール画面にログイン
・対象のDistributionを選択
・「Invalidations」タブをクリック
・「Create Invalidation」をクリックし、「/*」を入力して「Invalidate」をクリック
In Progress が Completed になれば反映完了です。
デプロイが完了したら、Shopifyのオンラインストアにインストールします。
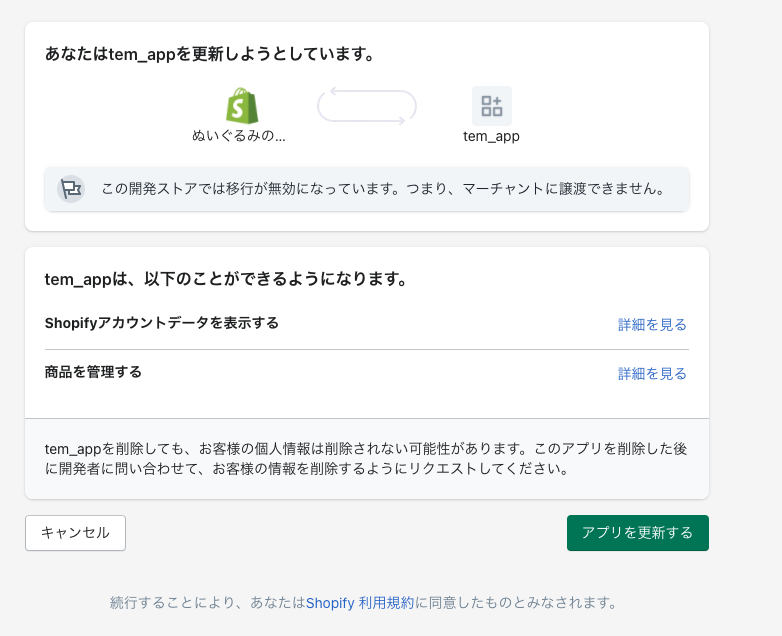
インストールが成功すれば、下図のように表示されます。

アクセスした時点で、Cognitoに新規会員登録が走ります。
自分のメールアドレスを確認し、verification codeをコピーしてきましょう。
app/react-amplified/src/Top.jsに戻り、今度はconirmationのコメントアウトを外します。
先ほどコピーしたverification codeに置き換えます。
async componentDidMount() {
    // TODO: ログイン画面の作成(signup -> confirmation -> login を一旦代替)
    // const res = await cognito.signUp('xxxxxxxxxx@gmail.com', 'P@ssw0rd1234567890')
    const res = await cognito.confirmation('xxxxxxxxxx@gmail.com',"verification codeを貼ってください")
    // const res = await cognito.login('xxxxxxxxxx@gmail.com', 'P@ssw0rd1234567890')
もう一度、デプロイします。
$ amplify publish今回もcloudfrontのキャッシュをクリアしましょう。
キャッシュクリアしたら先ほどのShopifyのアプリ画面へ戻ってください。
そうすると、ユーザー登録が完了します。
最後に、app/react-amplified/src/Top.jsに戻り、今度はloginのコメントアウトを外します。
async componentDidMount() {
    // TODO: ログイン画面の作成(signup -> confirmation -> login を一旦代替)
    // const res = await cognito.signUp('xxxxxxxxxx@gmail.com', 'P@ssw0rd1234567890')
    // const res = await cognito.confirmation('xxxxxxxxxx@gmail.com',"verification codeを貼ってください")
    const res = await cognito.login('xxxxxxxxxx@gmail.com', 'P@ssw0rd1234567890')
変更したら先ほどと同様、デプロイしてキャッシュをクリアします。
もう一度、Shopifyアプリ画面にアクセスすると、商品一覧が表示され、登録も可能になっているはずです。
以上で、サーバレスでのShopifyカスタムアプリ環境構築が完了です!
お疲れ様でした!m(_ _)m

コメント